WoW Dragonflight Mining Guide: Specializations

This handy Dragonflight Mining guide is dedicated to Specializations! Here we will unravel the intricacies of the Specializations system for the Mining profession that has been added in Dragonflight, offer personalized guidance contingent on your unique gathering goals, and provide a curated compilation of recommended Mining Specialization builds.

TABLE OF CONTENTS

Overview of Mining Specialization Changes in 10.0.5 and 10.1

While there are no changes to the specializations system in 10.1, the major shift for all Gathering professions in 10.0.5 was the ability to access your profession trees at Skill 25, 50, and 75 as opposed to the previous 25, 50, and 100. This adjustment is advantageous as it takes considerable time to attain the last 25 points of skill in both Dragonflight Herbalism and Dragonflight Mining.

The only Mining specialization tree that received a minor rework was Mastering the Elements, with slight changes. In the past, the Mastering the Elements tree needed to be accessed to gain the Overload Elemental Herb ability, which came with a 12-hour cooldown that decreased with each Dragon Islands node mined. In Patch 10.0.5, you will acquire Overload Elemental Deposit the first time you mine an Elementally-charged deposit, but this ability will have a set 12-hour cooldown that does not reduce initially. Accessing the Mastering the Elements tree will grant the ability to decrease the 12-hour cooldown through mining Dragon Isles nodes.

This adjustment is relatively insignificant; in essence, it makes little difference and does not affect recommendations for this tree.

Understanding Specializations and Knowledge Points in Dragonflight

Every Profession is characterized by its distinctive Specialization Tree. The focus of Crafting profession trees lies in the procurement of new recipes, the creation of items to augment your crafting, and the enhancement of crafting Secondary Skills, allowing the fabrication of superior products. On the other hand, Gathering profession trees boost gathering yields, increases the likelihood of securing rare items, facilitates mining while mounted Dragonflight, and even confers a minor crafting component to a single gathering profession. However, Secondary Skills such as Fishing and Cooking do not have their own specialization trees.

To unlock Specializations, a preliminary skill level of 25 in the respective profession is needed. Various actions earn Knowledge Points, which are then utilized to unlock different divisions within the Specialization tree. So, it would be beneficial if you have already found your personal Dragonflight mining route.

What are Knowledge Points?


Knowledge constitutes a new currency that you accumulate during Dragonflight. These points can be invested in your profession’s Specialization Trees to enhance your crafting capability.

Alterations made with Knowledge Points are irreversible! Once a Knowledge Point is used and changes are saved, they cannot be amended later.

Allocating your Knowledge Points is crucial. Although it is feasible to learn everything a Specialization can offer, the system is designed to require a substantial time commitment to maximize. Given that there is no option to refund Knowledge Points currently, selecting starting builds astutely is vital.

Relinquishing the profession and then re-learning it will not reset or reimburse spent Knowledge Points. You will recover everything you’ve acquired through Specialization and any remaining points, but you’ll revert to Skill (1) and have to re-learn any recipes.

There are various methods to earn Knowledge Points, such as first-time gathers, random drops, special trainers, quests, and Renown.

Assessing Mining Secondary Stats

There are three Secondary Stats for mining: Deftness, Finesse, and Perception. Deftness accelerates your Mining, Finesse enhances the extraction of base ores, and Perception increases the chance of obtaining more valuable side gathers, including more Khaz’gorite Ore from the two primary node types. Understanding their importance is crucial as these secondary stats are primarily developed through Specialization.

Perception is likely the stat you’ll prioritize. This boosts your probability of extracting extra Rousing Essences from elemental nodes. It increases the chances of obtaining more Khazgorite Ore from mines and raises the chances for more Gems if you choose that specialization. It also improves the chances of acquiring non-weekly limited Knowledge items, such as:

Finesse comes next in importance. This boosts your overall mining yields on the base ore.

Although it may be a contentious viewpoint, Deftness is not as compelling. While you’ll naturally gain Deftness as you invest in other areas, it’s not an aspect to concentrate on to the detriment of other options. If you frequently farm in War Mode, your perspective may differ. However, in my view, obtaining more ore, more essences, and more rare side gathers outweighs the benefit of completing mining a bit faster. If speed is your primary objective, assign a Highmountain Tauren as your mining Dragonflight farmer, as they enjoy faster Mining (an additional 25% Deftness, equating to 75 Deftness points).

Which Mining Specs Are the Best?


Continuing the
Mining guide Dragonflight, let’s delve into the best Mining Specialization builds. Over time, you’ll be able to develop every Specialization in Mining fully. However, players will need to decide which paths to pursue first, especially at the start of the expansion.

To a certain extent, the “optimal” build hinges on your objectives with Mining. Most players will aim to maximize their yields and gain the ability to mine while Dragonriding as swiftly as possible. Hence, all suggested builds kick off with the Mining Starter Build.

The Mining Starter Build

 In the beginning, your investment will be exclusively in one tree: the Mining Process, until it’s maxed out at 35 points. The primary feature of the Mining Process is the ability to mine while Dragonriding or mounted in the Dragon Isles. Nothing accelerates your mining more than avoiding the need to dismount and remount your dragon (or other mount). The extra 50 points of Deftness you receive at the end are also beneficial. This tree also offers significant bonuses in Deftness, Finesse, and Perception.

Early Points Distribution

  • 1-35: All points go into the Mining Process. At the end of this tree, you’ll unlock the ability to mine while Dragonriding in the Dragon Isles.
  • Upon reaching Mining (50), don’t neglect to choose a second tree. This will provide immediate benefits without spending any points to open a new tree. We advise opening Mastering the Elements first to acquire the Overload Elemental Deposit. This will offer the opportunity to earn up to +5 Knowledge by Overloading various types of Elemental mines (although you’ll need to enter War Mode to gain that last point!)

Remember to unlock all sub-specializations as they become available at 10, 20, and 30. This will give you +25 Deftness to all Mining for two of them and +15 Perception for the third. We suggest opting for Surveying first, as the +15 Perception will grant a +1.5% increased chance to find rare side gathers, which is more beneficial than faster mining. It costs nothing extra to unlock a sub-specialization once it becomes available, and you’re missing out on bonuses if you overlook it.

Our hierarchy of trees is as follows:


After maxing out the Mining Process, your Mining should be high enough that you can select at least one other tree – or you can opt to remain in the Mining Process and acquire the sub-specializations. From here, your choices will depend on your objectives. We will examine each of the three trees individually and suggest builds for specific aims.

We suggest the following builds in this sequence:

  1. Mining Process: Select this to mine more base ore and rousing essences, discover gems, find more rare side gathers, and speed up your mining. This is the premier build for gold generation.
  2. Mastering the Elements: Opt for this if you wish to specialize in Elementally-charged ores to gather more Rousing Essences and gain special effects from Elemental nodes. This is also an effective support build for earning money, although the Mining Process is superior for overall yields.

Metallurgy: Go for this if you want to learn to refine and upgrade all types of ore from Quality 1 through Quality 3. This is not a suggested build since Refining is a substantial money-losing proposition.

Mining Process Build

You’ve already allocated 35 points in this area to acquire the capacity to mine whilst mounted. What additional benefits does Mining Process provide? For a multitude of miners, this encapsulates the core of mining: going on a regular Dragonflight mining route, amassing more ore, discovering more fascinating items, and augmenting your mining velocity. This build is ideal for those intent on optimizing their total yield.

Beneath Mining Process, there are three sub-branches. If your principal objective is to escalate stats, select them in the subsequent order. However, if your interest predominantly lies in the extraction of Gems, you might desire to reorder your preferences (although it is still recommended to commence with Surveying):

  1. Surveying boosts your odds of gathering valuable side gathers such as more Khaz’gorite Ore by providing massive bonuses to Perception. It also includes the 30-point ability to find Illimited Diamonds (very rarely) in Rich ore veins.
  2. Sorting is a straightforward “obtain more of the straight gathers” tree. It not only gives huge bonuses to Finesse, which assists in gathering both more ore and more Rousing Essences, its 30-point ability gives you the ability to extract even more ore.
  3. Industrialization offers two advantages. It primarily focuses on Deftness, so choose this if you’re keen on increasing your mining speed. The crucial thing is that completing this tree lets you find Gems when you mine, not just by Prospecting. If you’re involved in Jewelcrafting, this will be highly appealing.

However, those who also engage in Jewelcrafting might be more interested in developing Industrialization first or at least giving it a priority after Surveying.

Recommended Points Distribution for Mining Process

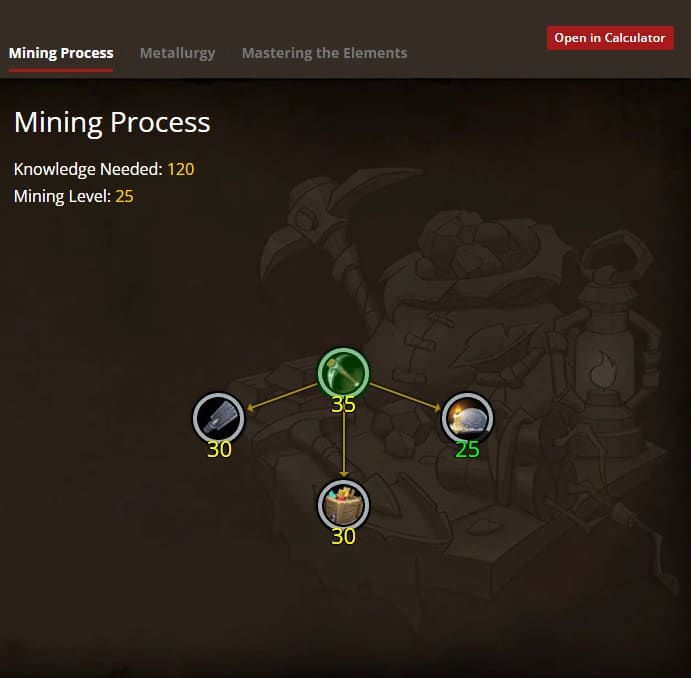
  • First 30 points: We suggest Sorting to enhance your collection rate of both ore and Rousing Essences. Finesse aids with both.
  • Next 30 points: Invest in Surveying. You want to maximize this benefit since you also gain +1 Perception for each point you invest in this tree on top of the bonuses.

If you’re a Jewelcrafter, you might want to develop Industrialization earlier. If Deftness and/or the ability to extract gems isn’t that significant to you, you might consider shifting out of the Mining Process tree to one of the other specializations, such as Metallurgy.

miningbuild
Sadly, there’s no way to upload the interactive calculator yet.

miningprocess_2

Mastering the Elements Build Overview

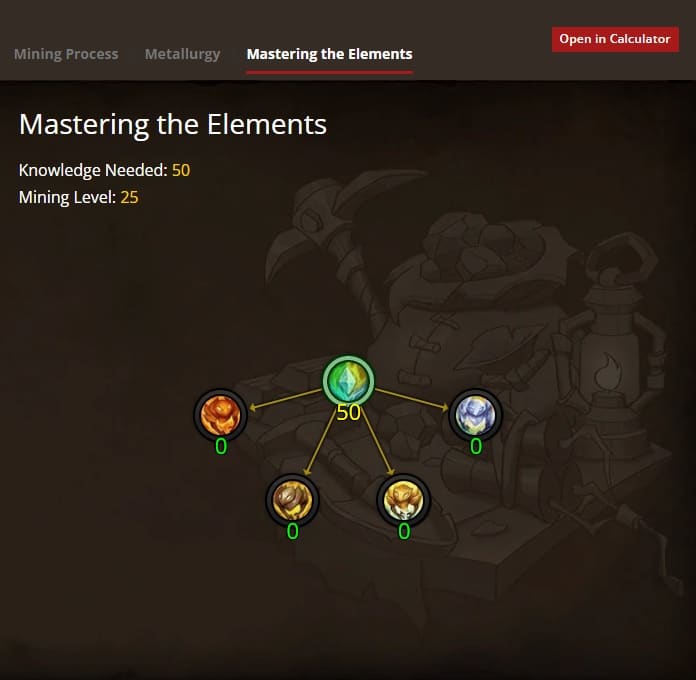
Mastering the Elements enhances your capacity to gather Rousing Essences, specifically Rousing Earth, Rousing Fire, and Rousing Order, as well as Rousing Ire in War Mode. Since Rousing Essences are consistently among the most valuable items on the Auction House, this build is ideal for making money.

The Overload Elemental Deposit ability, which you acquire the first time you mine an Elemental node, doesn’t have a cooldown reduction method until you unlock the Mastering the Elements tree. Once that’s done, every 2 deposits you mine will reduce the cooldown by 1 hour. Further investment in this tree can further decrease this cooldown.

Going Over the Mastering the Elements Tree

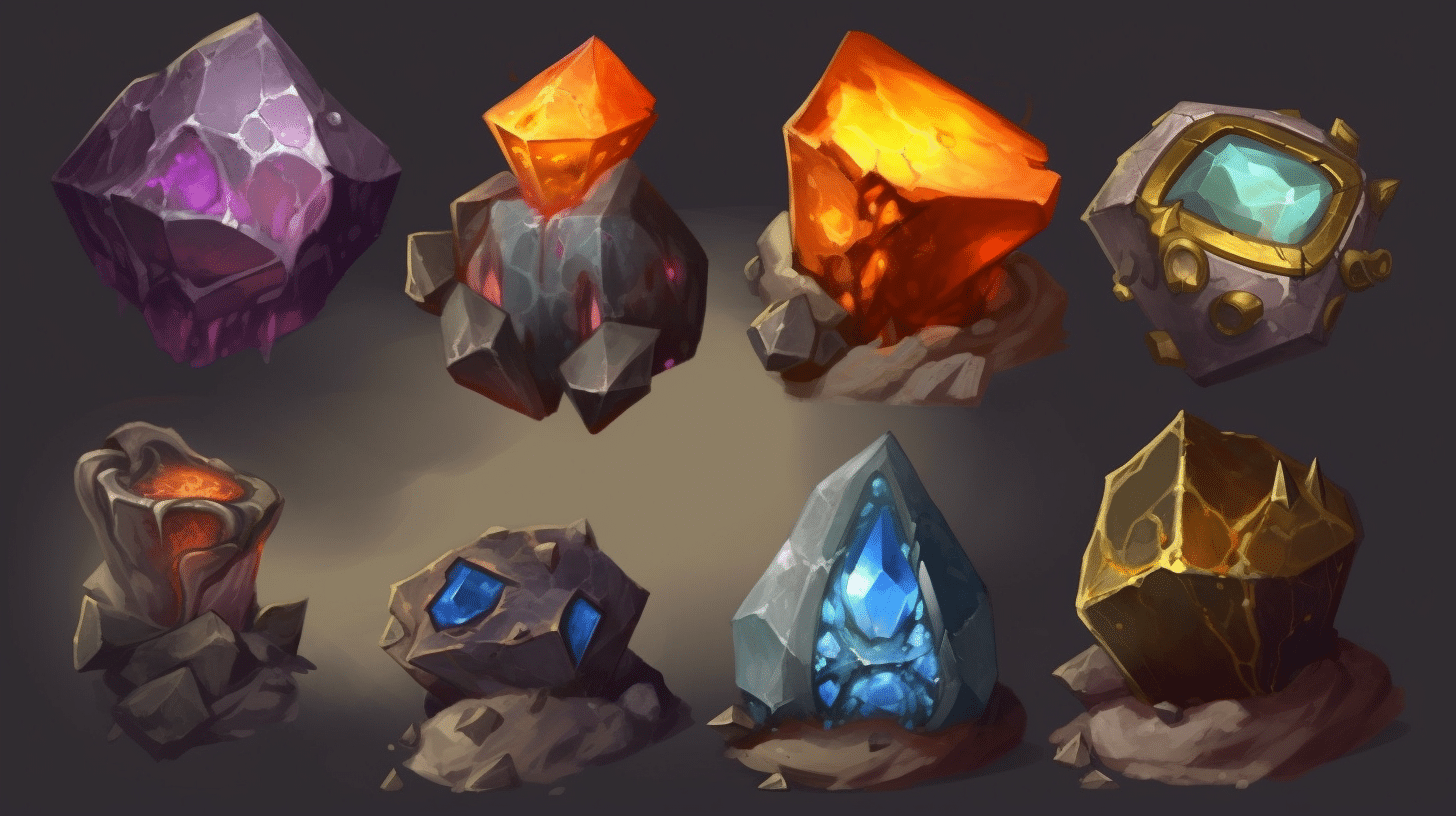
Mastering the Elements has a central hub with the option to specialize in four different Elemental types (Infurious specialization isn’t possible). You’ll initially invest in the central hub before deciding on which and which other types to invest in.

The significant advantage of Mastering the Elements is the gain of Skill, Deftness, and Perception for all elemental deposits. It also boosts the yield of Rousing Essences and eventually provides an additional chance to gather Rousing Essences when you overload.

The main concern is deciding which individual elemental charged mine, if any, to invest in further.

It’s beneficial to unlock all four, as each offers additional perks. Simply unlocking these sub-specializations (without point allocation at points 10, 20, 30, and 40 in Mastering the Elements) provides these advantages:

  • Molten: Cuts the damage from mining Molten deposits by 50%. This is crucial for those without natural immunity, or magic dispel capability.
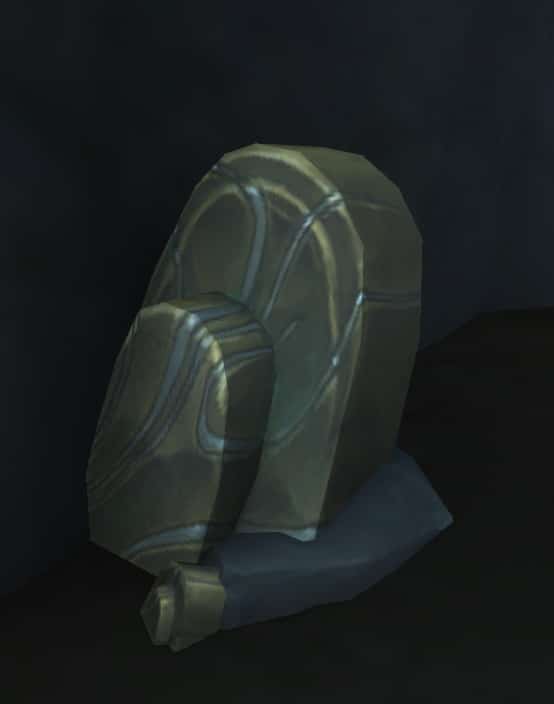
  • Hardened: Provides +25 Deftness when mining Hardened deposits. As Hardened deposits inherently slow miners, this mostly counteracts its primary negative effect.
  • Titan Touched: Enables you to establish a return portal when you Overload a Titan-Touched node.
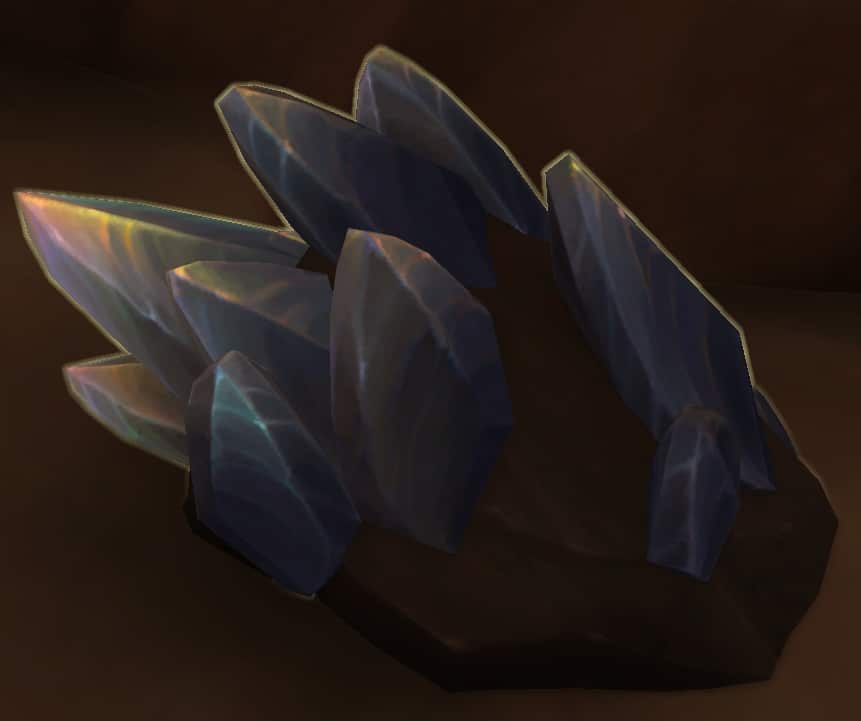
  • Primal: Primal deposits might contain Rousing Air or Rousing Frost, essences not usually found by miners.

Primal (for the extra essences) and Molten (if you lack a natural way to dispel the effect, which can be quite harsh) are the most beneficial. Hardened is the least useful as its slowdown effect isn’t that substantial.

I wouldn’t recommend investing heavily in any of these until you’ve completed the entire Mining Process tree (and before you allocate much into Metallurgy). Each of these increases stats for that specific type of elemental node, but putting 30 points into each will give you all the Finesse for increased extraction rates. The end buffs aren’t particularly impressive and are short-lived. In terms of boosting Rousing Essence yields, Sorting in the Mining Process tree performs better, especially if you have a good mining route Dragonflight in mind.

Recommended Points Distribution for Mastering the Elements

1-50: Mastering the Elements. Unlock the sub-specializations at 10, 20, 30, and 40 (probably in the order of Primal, Molten, Titan Touched, and Hardened).


Metallurgy Build Overview

The Metallurgy tree is crucial if you aspire to upgrade Serevite Ore, Draconium Ore, and Khaz’gorite Ore from Quality 1 to Quality 3. This tree is somewhat unique as it requires you to toggle between trees to complete these upgrades fully. Along the way, you’ll also acquire bonuses for +Skill, +Finesse, and +Perception.

Upgrading Serevite Ore and Draconium Ore through Quality 3 entails switching between two specializations, which makes this process somewhat unusual yet effective.

Gold-saving Tip: Depending on your regional Auction House economy, choosing Refining may not be the most financially sound decision.

Refining isn’t merely about transforming one ore into a higher-quality ore. It involves combining 5 ores to upgrade and then another 5 to reach the next level. In most economies, the first two levels of ore sell for nearly identical prices, while the highest quality fetches at best 2-3 times the price of the base ore. For the conversion to be economically viable, the highest quality ore would need to consistently sell for more than five times the price of the base ore. Your regional auction house may differ, but if upgrading is your sole reason for choosing Metallurgy, it may not be worthwhile.

The only justifications for choosing this tree are the associated bonuses or if you want to ensure a steady supply of ores for your own use. However, in most cases, it’s more prudent to sell the lower-quality ore and buy the higher-quality one.

This sequence enables you to unlock all ore refinement types, starting from Serevite and ending with Khaz’gorite.

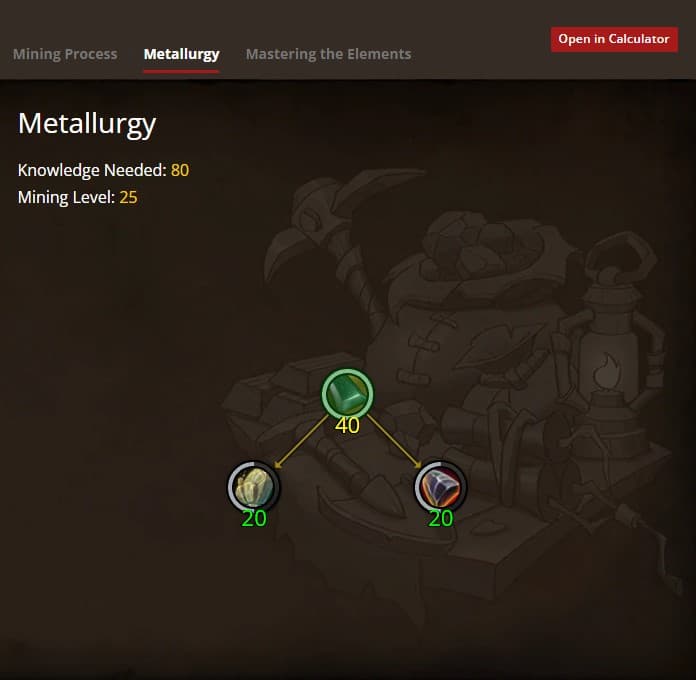
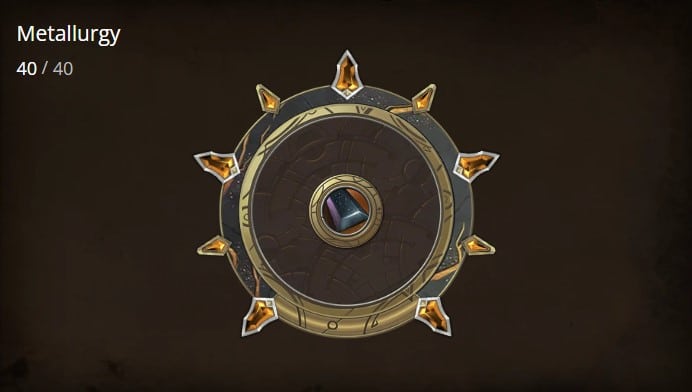
  • Points 1-10: Metallurgy. Unlocking this tree lets you upgrade Serevite Ore, and reaching 10 points allows you to upgrade Draconium Ore while also opening your first sub-specialization.
  • Points 11-30: Open the Serevite tree and allocate a total of 20 points, enabling you to upgrade Serevite Ore further.
  • Points 31-40: Metallurgy. You can now upgrade Khaz’gorite Ore.
  • Points 41-50: Remain in Metallurgy. This opens your second sub-specialization and gives you a chance to discover Awakened Order when refining Khaz’gorite Ore. (This isn’t a significant benefit as you likely won’t be refining much Khaz’gorite).
  • Points 51-70: Open the Draconium tree and allocate a total of 20 points. By 70 points, you can refine Draconium Ore further.
  • Points 71-80: Metallurgy. You can now upgrade Khaz’gorite Ore further.

This leaves you with 40 unspent points — and 20 each in Serevite and Draconium. While it’s not necessary to continue for refining purposes, the following benefits are available in the sub-trees. Consider these based on your goals.

Completing Serevite enhances your mining skill for Serevite and grants extra Finesse and Perception for mining Rich Serevite Deposits. The final 40-point ability offers a small chance of mining Gems from Serevite deposits, which could interest those with Jewelcrafting.

Completing Draconium improves your mining skill for Draconium and provides additional Finesse and Perception for mining Rich Draconium Deposits. As you obtain Khaz’gorite Ore more frequently as a rare side gather from Draconium than from Serevite, it may be beneficial to specialize in Draconium over Serevite to maximize your Khaz’gorite Ore yields. The final 40-point ability offers a small chance of obtaining Rousing Essences when refining Draconium Ore.


Giving You The Best Mining Route Dragonflight: Zaralek Cavern


Before we end our guide, we’ve mentioned mining routes a couple of times in our guide, but we’ve never given you one. Let’s fix that!

Above, you’ll see the route for mining across the Zaralek Cavern.

Essentially, you could merely remain in the central region and orbit around the lava river, as it’s an area rich in mineral deposits. However, if the competition proves too stiff, there are other locales worth exploring:

  • Deephollow Lake (61, 52)
  • The duo of caves at Slitherdrake Roost (54, 32)
  • Zaqali Caldera (31, 47)

Be cautious when mining in Zaqali Caldera, an area teeming with elite mobs. Upon entering, you’ll accumulate stacks of Dragonslayer’s Sight, and once you hit 10 stacks, you’ll be automatically dismounted. Hence, it’s prudent to carry at least 3-4 charges of Vigor if you’re planning to journey into this region.

Within the caves at Slitherdrake Roost, you may stumble upon up to three Serevite or Draconium Seams, making this site worth regular inspection. Deephollow Lake houses several ore deposit spawn points, and if left unchecked by others, you’re likely to consistently find at least 2-3 nodes here.

No ore deposits were detected at the Sulfur Wastes, save for those along the banks of the lava river. Similarly, the vicinity around Aberrus (to the north) appears devoid of ore deposits. The southern sector of the zone (at Glimmerog) doesn’t boast a high density of ore deposits either, rendering it unworthy of attention.

It is advisable to reserve your Overload Elemental Deposit for the Metamorphic Serevite Deposits and Metamorphic Draconium Deposits. Utilizing this mining ability on these deposits will yield a generous amount of extra Zaralek Glowspores, a currently high-priced resource.

Finding the Best Approach

In closing words to this WoW Dragonflight mining guide, I want to say that mastering the various specializations can seem like a daunting task. The journey to upgrade ores, gather precious essences, and navigate the intricate mining trees requires time, patience, and strategic planning. However, these challenges should not deter you from the incredible benefits that mining brings to your gameplay.

With the valuable resources and bonuses you can acquire, mining provides an unparalleled advantage to your game, whether in crafting, trading, or combat. It's an investment that genuinely pays off, enhancing your gaming experience and placing you ahead of those players who aren't doing it.


But what if you could bypass the steep learning curve and the grind? lfcarry.com offers an exceptional boosting service specifically tailored to this profession. This service aims to help you unlock your mining potential quickly and efficiently without you having to go through the lengthy process of figuring everything out on your own.

By choosing to use lfcarry.com’s boosting service, you’ll have the privilege of learning from the best, maximizing your mining capabilities, and enjoying all the benefits that come with the profession. It’s a shortcut to success, a fast-forward button to your mining mastery. It’s about time you unlock the full power of your gameplay with the help of LFCarry.com. Take that step today and experience the difference!

Twitter
LinkedIn
Facebook

Read also:

Dragonflight Season 4 Mythic+ Loot Table

WoW Dragonflight Season 4 Mythic+ Loot Table

Last Updated on April 24, 2024 by Lana Shakh Attention all Azeroth champions! The epic finale of the expansion is upon us, bringing you Dragonflight …

Read More
Brave-Weapons-Featured-Destiny-2

Brave Weapons 2024 in Destiny 2: When and How to Get Them

Last Updated on April 23, 2024 by Lana Shakh Guardians, brace yourselves for an epic loot chase like no other! Destiny 2’s latest content drop, …

Read More
Destiny 2: The Whisper Exotic Mission Walkthrough

Destiny 2: The Whisper Exotic Mission Walkthrough

Last Updated on April 22, 2024 by Blog Admin Welcome to the ultimate guide to “The Whisper,” an iconic Exotic mission revered among Guardians and …

Read More

Leave a Reply