Welcome to the ultimate guide for conquering the Amirdrassil Raid in Dragonflight 10.2! If you’re not just looking to survive but to dominate this high-stakes battleground, you’ve hit the jackpot. Discover how to morph into a duck to dodge Urctos’ lethal strikes, master game-changing strategies against Nymue, the Weaver of the Cycle, and unlock epic loot that’ll make you the envy of Azeroth. But that’s not all—want to blitz through the raid like a pro? We’ve got insider tips that’ll fast-track your victory. Gear up, gamer—Azeroth’s fate hangs on your skill and teamwork. Let’s dive in and own this raid!
TABLE OF CONTENTS
Unveiling the Mysteries of the Amirdrassil Raid in Dragonflight 10.2
Dive deeper into the enigmatic Emerald Dream, now under siege by Fyrakk and his malevolent allies. The Amirdrassil Raid is not just another mission; it’s a desperate struggle to save Azeroth from an impending apocalypse. Fyrakk, armed with dark magic and supported by the Druids of the Flame, aims to corrupt the World Tree, Amirdrassil and plunge the world into a cataclysmic inferno.
To join this epic battle, navigate your way to the Wellspring of Life. Your journey begins at the Wellspring Overlook, the closest flight point located on the Emerald Dream zone’s northern edge, just beyond the Field of Flames.
Your ideal raid composition? Two tanks, four healers, and a battalion of 14 DPS.
This raid is your theater of war, a labyrinth of challenges where only the best strategies, quickest reflexes, and strongest teamwork will see you through. From shape-shifting mechanics to intricate boss fights like Nymue, the Weaver of the Cycle, the Amirdrassil Raid offers a multi-layered gaming experience that will test your mettle at every turn.
So, are you prepared to be the hero Azeroth needs? The Amirdrassil Raid is your chance to prove it. This is not just a game; it’s a battle for the soul of a world. Gear up and get ready to make gaming history.
Boss-by-Boss: How to Triumph in Amirdrassil, Dragonflight 10.2
The bosses of Amirdrassil are a breed apart, each offering a unique battle experience that will push your gaming skills to the limit. Our boss guides are your secret weapon, packed with strategies to give you the edge in every fight. This is your roadmap to raid mastery.
Unveiling Gnarloot: The Fiery Guardian Turned Foe in Amirdrassil Raid
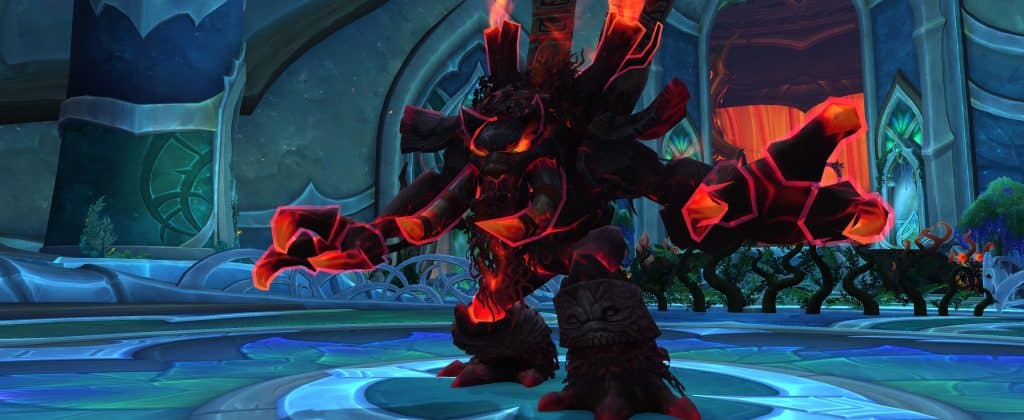
Gnarloot, once a revered protector of the Emerald Dream, has been twisted by flames into a harbinger of chaos. As the inaugural boss in the Amirdrassil Raid, this corrupted ancient presents a deceptively simple yet perilous challenge. Here’s your ultimate guide to understanding and defeating Gnarloot, complete with strategies, abilities, and recommended raid setups.
Abilities to Watch For:
- Tainted Lasher: These adds amplify the damage you take and apply DoTs and Bleeds.
- Flaming Pestilence: Watch out for four swirling beams that not only deal damage but also spawn Tainted Lasher adds.
- Controlled Burn: Four players will be marked, causing minor AoE damage and awakening dormant adds upon detonation.
- Dreadfire Barrage: A standard tank-swap mechanic.
- Tortured Scream: An unavoidable AoE attack that lasts for 10 seconds.
- Shadowflame Cleave: A frontal assault that deals massive damage.
Tactical Playbook
Phase 1: The Onslaught
- Strategic Positioning: Spread out around Gnarloot to better handle the Controlled Burn ability.
- Hero/Lust Timing: Save these abilities for the end of the Intermission phase to maximize damage output.
Phase 2: The Intermission
- Doom Cultivation: Gnarloot becomes immune, activating all dormant adds.
- Root Annihilation: Absorb Splintering Charcoal circles and burn the emerging roots.
- Healer Alert: Keep an eye on incremental raid-wide damage.
Post-Intermission
- Gnarloot takes 100% increased damage for 20 seconds.
- His damage output increases by 10% after each intermission.
Pro Tips
- Roots First: Focus on eliminating the roots during the Intermission phase.
- Cooldown Management: Ensure all cooldowns are ready for the post-Intermission phase.
Meet Igira the Cruel - The Sadistic Artisan of Agony
Step into the verdant labyrinth of the Emerald Dream and brace yourself for a face-off with Igira the Cruel, a malevolent entity with a penchant for weaponizing her enemies’ screams. This isn’t your run-of-the-mill single-target skirmish; it’s a tactical dance rife with DoTs and Cleave abilities.
Abilities to Watch For:
- Shared Agony: Targets the closest player to the active tank—usually the off-tank. If no one’s nearby, the main tank gets a double dose of pain.
- Blistering Spear: Marks players with explosive circles that create hazardous puddles. You’re tethered to these puddles until the Spear is broken.
- Twisting Blade: Sends three blades spiraling toward a random player. Dodge or suffer the consequences.
- Marked for Torment – Intermission: Igira pushes players away and marks three weapons. Absorb these weapons or face a raid wipe.
- Hacking Torment: Creates a soak circle around the active tank, stunning players inside it for 10 seconds.
- Slicing Torment: Teleports to players, dealing heavy damage and emitting damaging shadow waves.
- Flaying Torment: Casts an absorb effect that, if not dispelled, detonates and deals damage.
- Harvest of Screams: Post-intermission, Igira’s damage output increases by 10%.
Tactical Playbook:
- Weapon Soaking: Divide your raid into three groups—each assigned to a specific weapon (Slicing, Flaying, Hacking). Stick to this order for optimal results.
- Vicious Swing: This is a killer if not handled. Eliminate the Blistering Spear quickly and place the circles near Igira for extra cleave damage.
- Twisting Blade Alert: These blades are lethal if they hit. Dodge them.
- Energy Bar Watch: Keep an eye on Igira’s energy bar. At 100, she enters the Intermission Phase.
- Intermission Phase: Each group should rush to their assigned weapon and start soaking. Use magical immunity if the circle is filled with puddles.
- Post-Intermission: Prepare for new abilities based on the last-soaked weapon.
Pro Tips
Slicing: When Igira leaps to player locations, your main task is to dodge skillfully. Be cautious of Shared Agony during this phase.
Flaying: If targeted with a heart symbol, stack behind the boss and pop your healing cooldowns. This ensures that when the absorb effect ends, orbs are propelled away without hitting anyone.
Hacking: Assign players with immunity and stun-removal abilities to assist in soaking the tank circle, followed by a Mass Dispel. This minimizes debuffs and mitigates damage.
There you have it, a comprehensive guide to taking down Igira the Cruel in Amirdrassil, the Dream’s Hope. Remember, the key to victory is not just firepower but strategic finesse. So gear up, get in there, and may your screams be the ones of victory, not agony.
Council of Dreams - The Triad of Power in the Emerald Dream
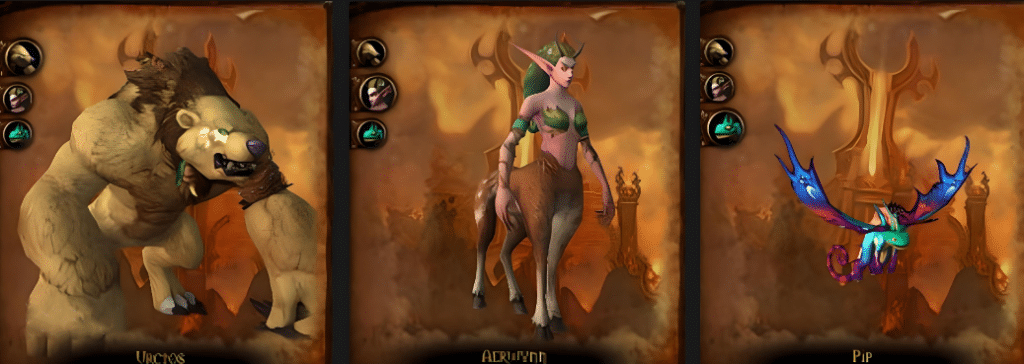
Prepare for an epic showdown against the Council of Dreams, a trio of bosses, each wielding unique abilities that will test your raid’s mettle. The council consists of Urctos, the brute force; Aerwynn, the wise strategist; and Pip, the cunning trickster. To claim victory, you’ll need to defeat all three simultaneously.
Abilities to Watch For:
Urctos:
- Blind Rage: When Urctos’ energy maxes out, he releases a damaging wave that intensifies until interrupted. Failure to do so within 20 seconds results in a raid wipe.
- Barreling Charge: Urctos charges at the tank, hitting anyone in his path. The more players he hits, the less damage he deals to the raid.
- Agonizing Claws: A frontal cleave that targets the current tank. A tank swap is necessary after each cleave.
Aerwynn:
- Constricting Thicket: At full energy, Aerwynn releases entangling vines that slow and damage players. If not interrupted within 20 seconds, it’s game over.
- Noxious Blossom: Toxic flowers that should be avoided unless you have a protective shield.
- Poisonous Javelin: A DoT effect that impacts multiple players and explodes after 10 seconds.
Pip:
- Song of the Dragon: At 100 energy, Pip encases players in bubbles that can only be broken by taking damage from Green Toxic Flowers.
- Polymorph Bomb: Transforms players into ducks, limiting their abilities but providing a way to interrupt Urctos’ Blind Rage.
- Emerald Winds: Gusts of wind that push players back and deal moderate damage.
Shared Ability – Rebirth:
All three bosses can cast Rebirth at 1% HP to restore 50% of their health. Coordinated DPS is essential to prevent this.
Tactical Planning:
- Target Priority: Start the fight focusing on either Pip or Aerwynn, as Urctos will naturally take damage throughout the encounter.
- Barreling Charge Strategy: Pre-assign 6-8 players to position themselves in the path of Urctos’ charge, rotating two players for each charge to minimize raid-wide damage.
- Pre-Spread: Ensure your raid is spread out before the encounter begins to handle abilities like Poisonous Javelin effectively.
Key Moments:
- Duck Transformation: Use the Polymorph Bomb to your advantage to interrupt Urctos’ Blind Rage.
- Vine Interruption: Position Aerwynn so Urctos’ Barreling Charge can interrupt her Constricting Thicket.
- Bubble Breaking: During Pip’s Song of the Dragon, position yourself near Green Toxic Flowers to break the bubble quickly.
Additional Tips:
- Tank Positioning: Keep Urctos facing away from the raid to avoid fatal damage from his frontal cleave.
- Energy Order in Heroic Mode: In Heroic Encounters, the bosses follow a set energy order: Urctos, Aerwynn, and Pip. Plan your strategies accordingly.
Larodar, Keeper of the Flame
Larodar, Keeper of the Flame, is a raid boss in the World of Warcraft’s Patch 10.2 raid, Amirdrassil: The Dream’s Hope. Once a faithful protector of the grove, Larodar has succumbed to the power of the flame and is now a twisted guardian bent on reducing the Emerald Dream—and anyone who stands in his way—to ash.
Abilities to Watch For:
- Engulfing Flame: Slowly being consumed by burning magic.
- Dreamway of the Flame: Larodar opens a fiery dreamway, teleporting himself to another location.
- Entangling Sprout: Larodar periodically launches fireseeds at nearby locations. Players who come within 2 yards of a fireseed destroy it and become rooted for 3 sec. If the fireseed is not destroyed after 5 sec, it will erupt into a Burnt Seed Husk.
- Everburning Shield: Larodar shrouds himself in flame, reducing all damage taken by 99%.
- Lingering Flames: As Larodar’s flames explode, they leave behind patches of flame that inflict 10 Fire damage to all nearby players.
- Scatter Fireseeds: Larodar periodically launches fireseeds at nearby locations. Players within 2 yards of a fireseed destroy it and become rooted for 3 sec. If the fireseed is not destroyed after 5 sec, it will erupt into a Burnt Seed Husk.
Boss Mechanics
Phase 1
- Tree Ents: The boss spawns three hostile tree ents. Once killed, they become friendly but with low health. Healers must heal them up.
- Seed of Life: Up to 3 players can interact with the Seed of Life to clear fire pools.
- Scorching Root: A spider add spawns and fixates on a player. It must be killed ASAP and healed to bloom into a bush.
- Raging Inferno: Players must be inside the bush circle to reduce damage by 90%.
- Tank Knockback: The boss does a knockback on the tank, and the damage is reduced based on the tank’s distance from the boss.
Intermission
- Consuming Flame: When the boss reaches 40% health, use heavy damage reduction abilities and big healing cooldowns.
Phase 2
- Falling Embers: Players must soak the circles that spawn.
- Flash Fire: Players with a circle around them must move away from the raid, and healers must heal them to remove the absorb shield before 8 seconds pass.
- Adds: The boss spawns many adds that move towards him. They must be CC’d and killed with pauses in between for healers to top up the raid.
Player Comments
- Larodar can be defeated by killing the squiggly fire tentacles, not directly hitting him.
- Some players reported that Larodar disappeared after a few close-in attacks.
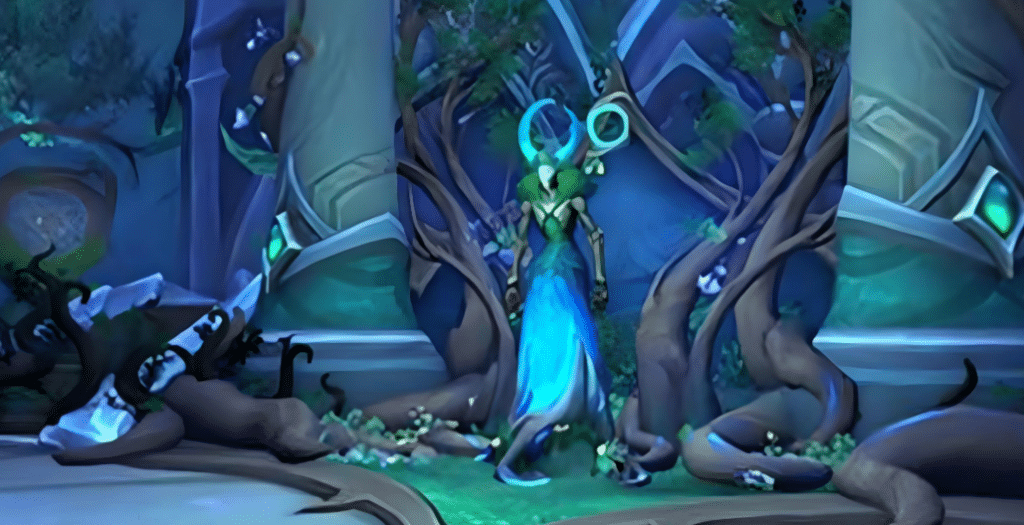
Nymue, Weaver of the Cycle
Nymue, the guardian of the Emerald Dream’s intricate tapestry, is not a boss to be underestimated. While she may appear to be a straightforward single-target encounter, the reality is far more complex. Let’s explore the mechanics, abilities, and strategies needed to conquer this enigmatic weaver.
Abilities to Watch For:
- Continuum: At full energy, Nymue enters an invulnerable state, summoning Cycle Wardens that deal escalating damage to the raid. Interrupting their Nature Volley is crucial.
- Verdant Matrix: Crossing the floor lines inflicts immediate and lingering damage. However, this can be negated in grassy areas.
- Inflorescence: Moving through grassy terrain grants immunity to Verdant Matrix and boosts your speed by 45%.
- Threads of Life: Beware of ethereal daggers that target random players. These daggers can either be a minor inconvenience or a major threat, depending on your positioning.
- Violent Flora: Initially, these ground patterns are to be avoided, but once they disperse, they create grassy areas that offer immunity to Verdant Matrix.
- Weaver’s Burden: Tanks, watch out for this ticking time bomb of an ability. It not only deals raid-wide damage but also makes you more susceptible to Nature damage.
- Threaded Blast: A devastating blow that tanks should avoid, especially those under the effects of Woven Resonance.
- Viridian Rain: A raid-wide damage ability that gains potency after each intermission phase.
Strategy & Tactics
Phase 1
- Positioning: The raid should be divided into two balanced groups. The room is filled with damaging lines, so movement should be minimized.
- Violent Flora: Dodge these patterns and utilize the resulting grassy areas to cross lines without taking damage.
- Threads of Life: These daggers can be manipulated by your movement. Lead them across a line before they reach you to minimize damage.
- Tanks: When afflicted with Weaver’s Burden, move away quickly and be cautious of your health as you return.
As Nymue reaches full energy, prepare for the intermission phase.
Intermission
- Kick Rotation: Establish a rotation to interrupt Nature Volley from the Cycle Wardens.
- Health Management: Ensure you’re not critically ill before crossing the reactivated lines.
- Energy Accumulation: Nymue seems to gain energy faster post-intermission, so be prepared for more frequent casts of her abilities.
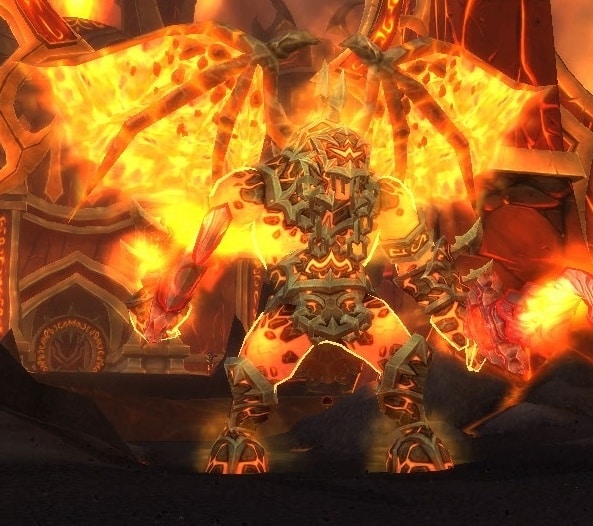
Smolderon: The Fiery CEO of Firelands Unveiled!
Welcome to the boardroom of Infernos, where Smolderon, the Fiery CEO of Firelands, is ready to set your raid ablaze! This boss is not just about DPS; it’s a complex ballet of dodging, soaking, and strategic positioning. If you’ve ever wanted to show off your raid’s prowess, this is the stage to do it. So, let’s dive into the mechanics and strategies that will help you extinguish this fiery executive.
Defensive and Mobility Utilities
- Defensive: AMZ, Barrier, Darkness, Spirit Link
- Mobility: Speed-Totem, Roar, Timer Spiral, Gateway
Hero/Lust Usage
Activate during the last intermission, around 30% of the boss’s health.
Abilities to Watch For:
- Brand of Damnation: This is the linchpin of the fight. The tank will be marked with a circle that needs soaking by players without the Overheated debuff. Failing to soak properly will buff Smolderon’s damage by 10%. The soaked players will then drop explosive circles, requiring quick sidestepping.
- Searing Aftermath: The tank hit by Brand of Damnation will get this debuff, which explodes after 6 seconds. The damage decreases with distance, so the tank should sprint away from the raid.
- Overheated: This targets half the raid simultaneously with Brand of Damnation. Players with Overheated should scatter to avoid damaging others and then dodge the ensuing fire tornadoes.
- Lava Geysers: These are random swirls that must be dodged and will force your raid to stack up to keep the area clean.
- Blistering Heat: This is an unavoidable DoT that intensifies after each intermission.
Strategy & Tactics
Phase 1
- Positioning: Start with everyone stacked near the room’s edge and move along it to avoid magma puddles.
- Overheated & Brand of Damnation: Players with Overheated should move out before exploding, while the others should run to the tank and use personal damage reduction cooldowns.
- Tank Strategy: The tank should rush to the room’s center to explode with Searing Aftermath.
Intermission
- Orb Collection: After being knocked back, players will spawn orbs that increase damage and healing. Collect these quickly, but watch your health.
- Dance Game: Like the Soulrender Dormazain fight, you must stay in changing safe spots.
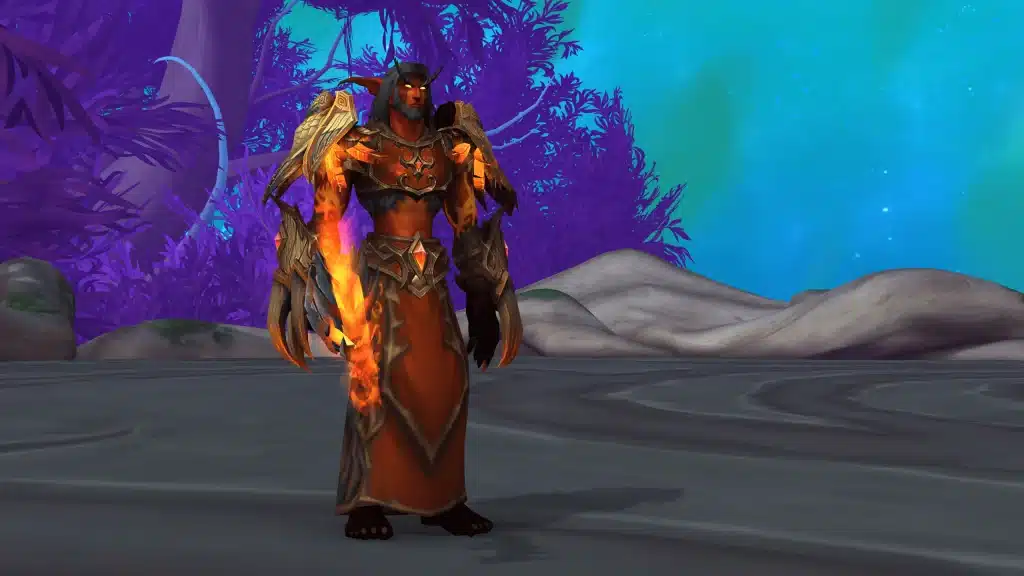
Tindral Sageswift, Seer of the Flame
Tindral Sageswift is not just another boss in the Amirdrassil, The Dream’s Hope raid in World of Warcraft; he’s a formidable druid with a mastery over shapeshifting. This guide aims to break down the complexities of the fight against Tindral, who cycles through four distinct forms—Humanoid, Owl, Moonkin, and Tree of Flame—each with its own challenges and mechanics.
Forms and Abilities
Tindral’s versatility is his strength. Here’s what you can expect from each form:
- Humanoid: Specializes in Mass Entanglement, rooting players while dealing damage.
- Owl: Aerial bombardment is the Owl’s forte.
- Moonkin: Sunfire and Fire Beams are the key abilities here.
- Tree of Flame: Emits Suppressive Ember energy and wields the Tranquility of Flame ability.
Strategy & Tactics
Phase 1: Humanoid, Moonkin, and Owl Forms
- Searing Wrath: This debuff targets the tanks, inflicting fire damage every 2 seconds for a 20-second duration. The off-tank should be prepared to taunt the boss before the damage becomes unmanageable.
- Wild Mushrooms: Exclusive to Mythic difficulty, Tindral begins to spawn Blazing and Poisonous Mushrooms around himself. These mushrooms erupt after 2 seconds, dealing both fire and nature damage. If a player is caught in this explosion, the entire raid will suffer a significant DoT (Damage over Time).
- Falling Stars: Stars initiate a descent, targeting a random player and causing damage within a 15-yard radius upon impact. These stars leave behind Star Fragments that explode within a 4-yard radius shortly afterward.
- Mass Entanglement: Fiery Vines manifest around the arena, targeting players. Those ensnared by the vines start taking damage and are rooted in place until the vine is destroyed.
- Moonkin of the Flame: In this form, Tindral starts casting Sunfire every 3 seconds. Sunfire inflicts Nature damage and applies a DoT debuff.
- Fire Beam: Another ability in Moonkin form during phase 1. Tindral blasts areas with Fire Beams, causing damage to players caught in a 15-yard radius blast.
This phase demands particular attention to Mass Entanglement and Supernova spells, especially in Heroic and Mythic difficulties where Owl and Moonkin forms introduce new mechanics.
Intermission: Burning Pursuit – Humanoid and Owl Forms
- Burning Pursuit: Tindral morphs into an Owl and takes to the skies. Players can chase him using dragon mounts, thanks to Empowered Feathers dropped by Tindral. Flying through Dream Essence grants a stackable buff that boosts raid damage by 5% per stack. Consuming Dream Essence also leaves behind an Emerald Gale, which increases flying speed and grants 3 stacks of Vigor.
- Typhoon: The Owl form generates Typhoons that deal moderate damage to players.
- Scorching Feather: Tindral releases Scorching Feathers, leaving behind Scorching Plumes. These plumes deal Fire damage and remove Vigor stacks from players.
- Supernova: Tindral reverts to his humanoid form, applies an absorb shield, and starts casting Supernova. To avoid a wipe, the raid must destroy this shield before the cast completes.
Phase 2: Owl, Humanoid, and Tree of Flame Forms
- Incarnation: Tree of Flame: Tindral transforms into the Tree of Flame, triggering the Suppressive Ember ability.
- Suppressive Ember: This is a shield that absorbs a significant amount of incoming damage and can stack. Players must destroy the shield quickly to damage the boss.
- Tranquility of Flame: This AoE attack deals damage for 10 seconds to everyone in the raid. During this time, Tindral also scattered Seeds of Flames. If not destroyed, these seeds grow into Trees that deal damage to all players. Stepping on a seed in Heroic and Mythic difficulty grants a +50% damage taken debuff.
The second intermission and Phase 3 will have all the forms and spells, including Supernova. Heroic and Mythic difficulty raid groups must deal with all the additional mechanics from Owl and Humanoid forms.
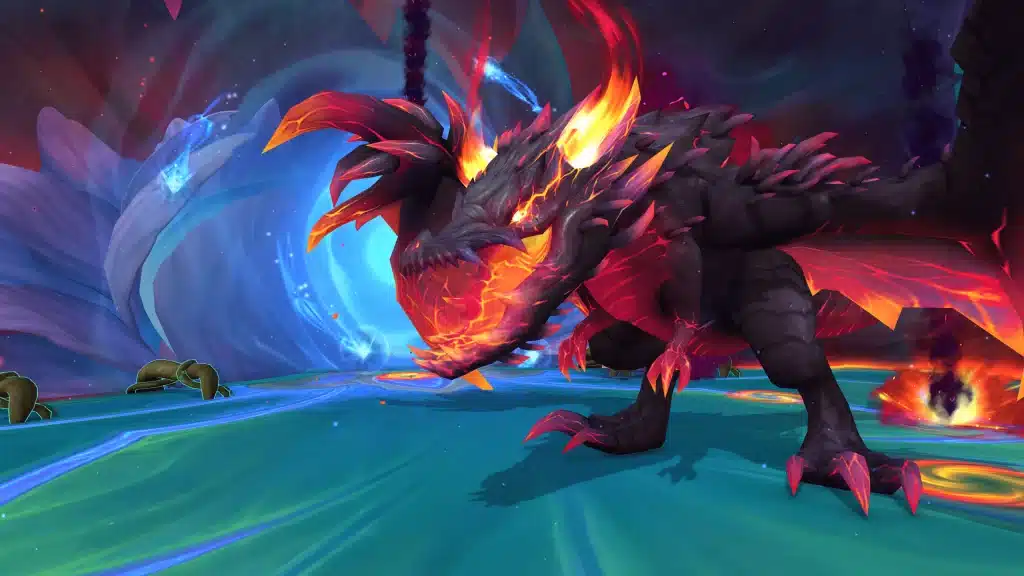
Who is Fyrakk the Blazing?
Fyrakk the Blazing serves as the grand finale in the Amirdrassil, The Dream’s Hope raid in World of Warcraft’s Dragonflight expansion. As the primal force behind the Primalists faction, Fyrakk wields the legendary axe, Fyr’alath, and aims to incinerate the newly sprouted World Tree, Amirdrassil.
Phase 1: Unveiling the Dream Render Mechanics
Guarding the Roots of Amirdrassil
- What Happens: The roots of the World Tree are the lifeblood of this phase. If they get scorched by Raging Flames, it’s game over for the raid.
- Strategic Response: The raid must be vigilant in controlling the Raging Flames to safeguard these vital roots.
Meteor Shower: Firestorm Unleashed
- What Happens: Meteors rain down, inflicting Shadowflame damage within a 9-yard radius and spawning hazardous Raging Flames zones.
- Strategic Response: Raid members should maintain optimal spacing to limit the Raging Flames’ area of effect.
The Spreading Wildfire
- What Happens: Fyrakk’s Fyr’alath axe strikes the World Tree, causing existing Raging Flames to proliferate.
- Strategic Response: Quick footwork is essential to dodge the expanding Raging Flames.
Rifts in Reality: Dream Rend
- What Happens: A rift to the Firelands opens, pulling players in while dealing escalating damage.
- Strategic Response: Distance is your friend; move away from the rift to reduce incoming damage.
The Explosive Blaze Debuff
- What Happens: Random players get a ticking time bomb debuff that will detonate, harming nearby allies.
- Strategic Response: Isolated positioning is crucial for those affected to minimize raid-wide damage.
Fyrakk’s Burning Aura
- What Happens: A searing heat emanates from Fyrakk, dealing periodic damage and applying a stacking DoT called Aflame.
- Strategic Response: Healers should prioritize dispelling Aflame and closely monitor the raid’s health.
The Fyr’alath’s Vicious Bite
- What Happens: The main tank suffers a dual-type damage from Fyrakk’s legendary axe.
- Strategic Response: A tank swap is advised to manage the accumulating damage.
Interlude: The Perilous State of Amirdrassil
Corrupting the Heart
- What Happens: Fyrakk focuses his dark energies on the Heart of Amirdrassil, creating a protective barrier.
- Strategic Response: A DPS race ensues; the raid has 30 seconds to shatter this barrier or face defeat.
Dragon Transformation: Incarnate
- What Happens: Fyrakk ascends, morphing into a dragon and causing widespread damage upon his descent.
- Strategic Response: Healers should pre-cast AoE healing spells to counteract the massive damage.
Orbs of Flame: A Healing Dilemma
- What Happens: Flame Orbs are drawn towards Fyrakk, potentially healing him.
- Strategic Response: Players must intercept these orbs, despite the risk of receiving a Singed debuff.
Phase 2: The Celestial Challenge – Children of the Stars
The Heart’s Last Stand
- What Happens: The Heart of Amirdrassil’s health becomes the focal point. If it’s depleted, the raid faces an inevitable wipe.
- Strategic Response: The raid must balance DPS on Fyrakk and healing the Heart to survive.
Spirits of Kaldorei: The Heart’s Lifeline
- What Happens: Spirits emerge to heal the Heart, transferring their own health to it.
- Strategic Response: Healers should focus on rejuvenating these spirits to maximize the Heart’s health pool.
Meteor Strikes: Greater Firestorm
- What Happens: Similar to Phase 1’s Firestorm, but now spawns a Burning Colossus.
- Strategic Response: Tanks should immediately aggro the Burning Colossus, while DPS focuses on bringing it down.
Shadowflame Devastation: A Deadly Line of Fire
- What Happens: Fyrakk spews a line of flames, creating Flamespawns that can annihilate Spirits of Kaldorei.
- Strategic Response: DPS should prioritize eliminating these Flamespawns to protect the Spirits and, by extension, the Heart.
Phase 3: The Final Countdown – Shadowflame Incarnate
Seed of Amirdrassil: A Double-Edged Sword
- What Happens: Seeds sprout on the World Tree, which can either shield players or harm them, depending on how they’re interacted with.
- Strategic Response: Players should carefully manage these seeds, utilizing them for shields while avoiding their corruption.
Eternal Firestorm: A Rain of Destruction
- What Happens: Meteors fall, causing damage within a 4-yard radius.
- Strategic Response: Maintain spacing to minimize the impact area and resultant damage.
Apocalypse Roar: The Ultimate Test for Healers
- What Happens: A devastating roar inflicts massive damage and applies the Aflame debuff.
- Strategic Response: Healers should be ready to dispel Aflame and use their strongest healing cooldowns.
Shadowflame Breath: A Corrupting Exhale
- What Happens: Fyrakk’s breath can corrupt Seeds, turning them against the raid.
- Strategic Response: Tanks must angle Fyrakk away from any Seeds to prevent their corruption.
Burning Maw: The Tank’s Nightmare
- What Happens: Fyrakk devours the main tank, applying a stacking debuff called Engulfed.
- Strategic Response: A tank swap is crucial here to mitigate the escalating damage from Engulfed.
Amirdrassil Raid: The Ultimate Treasure Trove
Difficulty Tiers: Choose Your Challenge
Amirdrassil offers a tiered experience, catering to everyone from the casual adventurer to the most dedicated raiders. The four levels of difficulty—Raid Finder, Normal, Heroic, and Mythic—ensure that the loot scales with the challenge.
The Spoils of Valor: Raid Rewards
As you conquer each formidable foe in the Dragonflight-themed Amirdrassil raid, the quality of your loot escalates. From high-level gear to legendary weapons and exclusive mounts, your commitment to the raid is generously rewarded.
- Item Level Peaks: Up to 489 ilvl
- Exclusive Gear: AtDH Weapon & Armor Set
- Legendary Relic: Fyr’alath, the Dream Render
- Mounts of Legend: Anu’relos, Flame’s Guidance, and Renewed Proto-Drake variants
- Prestige Badges: Fyrakk the Blazing Feats of Strength achievement
Gear Progression: Item Level Overview
The item level of your loot is directly proportional to the raid difficulty:
- Raid Finder: 441-450 ilvl
- Normal: 454-463 ilvl
- Heroic: 467-476 ilvl
- Mythic: 480-489 ilvl
Mounts: The Pinnacle of Raid Rewards
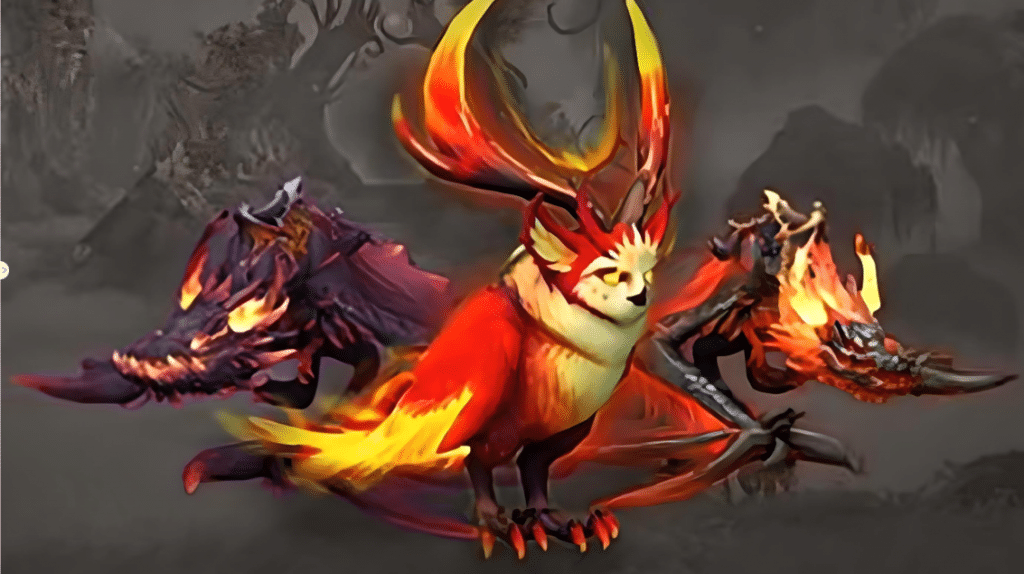
Amirdrassil introduces awe-inspiring mounts, each tied to a specific difficulty level. The Mythic-exclusive Anu’relos, Flame’s Guidance, is not just a mount but a symbol of your raiding prowess, offering dynamic flying capabilities.
Achievements: The Hallmarks of Excellence
Amirdrassil offers a plethora of achievements, each a testament to your skill and dedication. From the Gnarlroot Achievement to the coveted Ahead of the Curve: Fyrakk the Blazing Feats of Strength, these accolades are more than just bragging rights—they’re your entry ticket to elite raiding circles.
Weaponry: The Tools of Conquest
The most sought-after weapon is undoubtedly Fyr’alath, the Dream Render, a legendary axe with unparalleled power. Other notable weapons include:
- Melee Weapons: Cruel Dreamcarver, Thorncaller Claw
- Magical Implements: Gholak, the Final Conflagration; Vakash, the Shadowed Inferno; Rashon, the Immortal Blaze
Trinkets: The Icing on the Cake
- For Physical DPS: Bandolier of Twisted Blades, Branch of the Tormented Ancient, Cataclysmic Signet Brand
- For Magical DPS: Blossom of Amirdrassil, Belor’relos, the Suncaller, Nymue’s Unraveling Spindle
- Universal: Ashes of the Embersoul, Smoldering Seedling, Gift of Ursine Vengeance, Augury of the Primal Flame, Pip’s Emerald Friendship Badge
Unlock Your Dream Loot—Fast Track Your Glory with LFCarry.com!

Picture this: You’re soaring through the skies of Azeroth on the majestic Anu’relos, Flame’s Guidance mount, a symbol of your triumphs. You feel the weight of the legendary Fyr’alath, the Dream Render, in your hands, a testament to your skill and valor. Sounds like a far-off dream? Not anymore. With LFCarry.com, this dream isn’t just attainable—it’s within your grasp.
We offer more than boosts; we offer custom solutions. We’ll create a tailored package for you if you are still looking for what you want.
Ready to level up your WoW experience? Click here, and let’s turn that dream into reality. Choose LFCarry.com—where your gaming dreams take flight.
Read also:

Lana Shakh is a dedicated gaming expert specializing in Destiny 2 and other popular online titles, creating in-depth guides that break down complex mechanics, optimize gameplay strategies, and help players of all skill levels achieve their in-game goals.



2 comments
zoritoler imol
May 3, 2024 at 12:08 pmHello.This post was really motivating, especially since I was searching for thoughts on this topic last Monday.
zoritoler imol
June 8, 2024 at 9:33 pmThere is noticeably a bundle to know about this. I assume you made certain nice points in features also.