The Finality’s Auger Exotic Catalyst is one of the most coveted upgrades in Destiny 2, enhancing the already powerful Solar linear fusion rifle with additional perks. To obtain this catalyst, Guardians must complete a hidden questline within the Sundered Doctrine dungeon, solving intricate puzzles and collecting rare items. This guide provides a step-by-step walkthrough to ensure you unlock the catalyst as efficiently as possible.
- Finality's Auger Linear Fusion Rifle Boost
Enhance your arsenal with the Resounding Fusion Rifle, a top-tier weapon perfect for heavy hitters in Destiny 2.
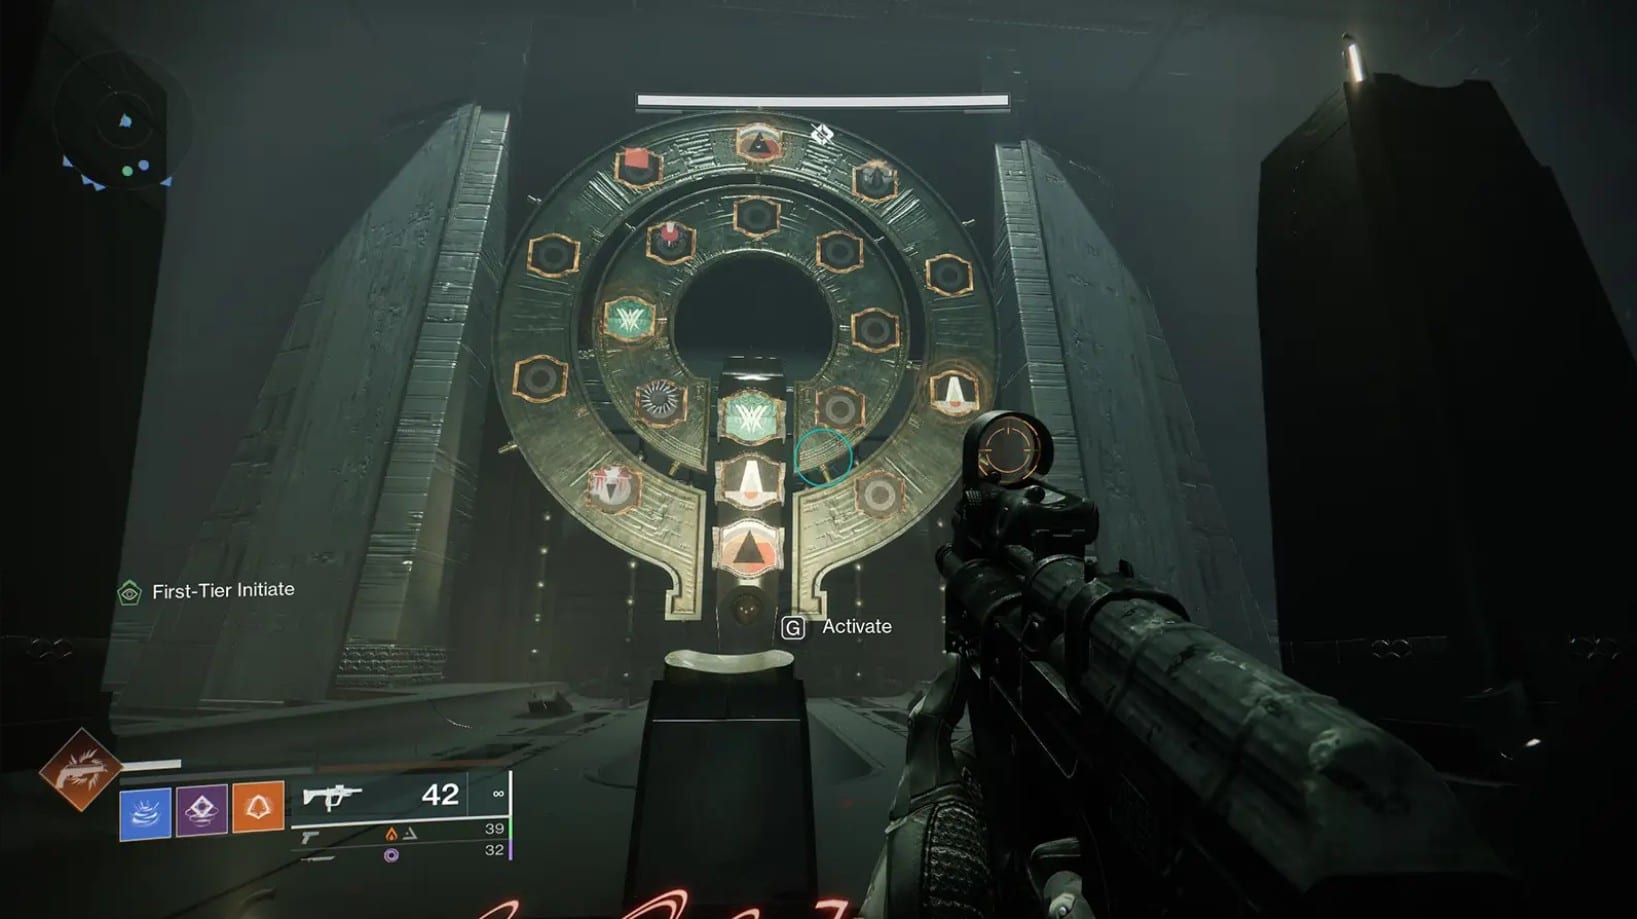
- The Drowning Labyrinth Quest Boost
Embark on the enigmatic journey of The Drowning Labyrinth, a secret quest nestled within Destiny 2's Sundered Doctrine dungeon.
How to Start the Quest for Finality’s Auger Catalyst
Table of Contents
Step 1: Enter the Sundered Doctrine Dungeon
To begin, launch the Sundered Doctrine dungeon located in Savathûn’s Throne World. Unlike standard dungeon completions, unlocking the Finality’s Auger Catalyst requires interacting with hidden mechanics throughout the run. Also, remember that completing the Sundered Doctrine dungeon during its initial 48-hour Contest Mode guarantees the drop of Finality’s Auger.
Step 2: Complete the “Drowning Labyrinth” Quest
Once inside, activate the hidden “Drowning Labyrinth” quest, which is essential for progressing toward the catalyst. This quest involves collecting nine Hive Worms scattered throughout the dungeon and solving symbol puzzles that resemble mechanics from the Vow of the Disciple raid.
Hive Worm Locations & Collection Guide
Each Hive Worm is hidden in a specific area of the dungeon, and collecting them in the correct order is crucial. Here’s where to find them:
First Three Hive Worms
Hellmouth (Moon): This area contains 3 Hive Worms, located in secret rooms that are hidden behind destructible walls. One is in the leftmost tunnel, the second is deep inside the Hellmouth caves near a cluster of Hive enemies, and the third can be found above a large, dark pit.
Mid-Dungeon Hive Worms
Anchor of Light (Moon): You’ll find 3 more Hive Worms in this area, typically near Hive statues or underground chambers. One is behind a cryptic rune wall, another is on a small ledge after a platforming section, and the last one is near a cluster of Hive Knights.
Final Three Hive Worms
Sorrow’s Harbor (Moon): The final 3 Hive Worms are in this area, usually in dark recesses near the edges of the map. One is hidden inside a large crypt near the center of the area, another is in a cave leading off the side of the map, and the third is found inside a large fallen structure guarded by Hive.
After collecting all nine Hive Worms, return to a Pyramid console located near the final boss room to input the correct symbol sequence and progress the quest.
Completing the Catalyst Quest
Step 3: Solve the Symbol Code Puzzle
At the Pyramid console, a set of symbols must be entered in a specific sequence. These symbols are randomly generated per dungeon run, requiring players to memorize or document them throughout their journey.
Symbol Code Puzzles:
- After collecting all nine Hive Worms, you will encounter the symbol puzzles within the Drowning Labyrinth. These puzzles require you to decipher Hive symbols found on various walls.
- How to Solve:
- Symbol Locations: As you progress through the Labyrinth, you will see walls etched with symbols that you’ll need to interact with. These symbols are tied to Hive lore and require you to input the correct sequence to continue.
- Clues for the Puzzle: The order of the symbols is often based on the environmental setup—certain Hive symbols may glow or resonate differently when you approach them. Pay close attention to these visual cues.
- Puzzle Nature: There are a few types of symbol puzzles, some requiring you to stand in the correct positions to reveal hidden patterns, while others demand you to match a specific sequence based on Hive architecture or enemies encountered in the area.
- Solving the puzzles will allow you to progress and unlock the Catalyst at the final stage of the quest.
Step 4: Defeat the Final Boss
Once the puzzle is solved, an additional damage phase will be unlocked for the final boss. Survive the encounter and defeat the boss once more to obtain the Finality’s Auger Exotic Catalyst as a reward.
What Does the Finality’s Auger Exotic Catalyst Do?
Activating this catalyst grants the Bait and Switch perk, enhancing the weapon’s damage significantly when alternating between different weapons before firing. Additionally, it improves reload speed and stability, making Finality’s Auger an even more dominant choice for high-level PvE activities.
Bait and Switch:
This perk increases damage dealt when you deal damage with all of your equipped weapons in quick succession. For example, if you use your primary weapon, quickly switch to Finality’s Auger, and fire, your Auger shots will receive a damage boost. This damage boost stacks based on the number of weapons you cycle through in rapid succession.
- How to Maximize Bait and Switch:
- Fast-Reloading Weapons: Combine Finality’s Auger with weapons that reload or swap quickly, such as auto rifles, hand cannons, or sidearms. The quicker you switch between weapons, the more damage you’ll get from Bait and Switch.
- Playstyles:
- Aggressive Playstyle: If you focus on close-quarters combat, pairing Finality’s Auger with a shotgun or submachine gun will be incredibly effective. After landing a shot with your primary weapon, switching to Finality’s Auger will trigger the Bait and Switch perk, boosting your Auger damage.
- PvP Builds: For PvP, pairing Finality’s Auger with a sniper rifle or fusion rifle is a great combo. Quick weapon swaps can take down enemies in an instant, with a huge damage boost coming from Bait and Switch. This works best in 1v1 or 1v2 situations where you’re likely to engage in rapid combat.
- Subtle Weapon Choices: You can also pair Finality’s Auger with high-utility weapons like grenade launchers or fusion rifles to surprise enemies with both high burst damage and strategic zoning.
Outside of Contest Mode, obtaining Finality’s Auger is not guaranteed and relies on random number generation (RNG). Players may need to complete the dungeon multiple times to acquire the weapon. Players can increase their chances of obtaining Finality’s Auger by completing specific Triumphs within the dungeon. Currently there are three methods: finding all nine collectibles, completing all encounters solo without leaving the activity, and completing all three encounters on Master difficulty.
Weapon Statistics:
Here are the detailed stats for Finality’s Auger to help you understand its performance:
- Charge Time: 533 milliseconds
- This is the time it takes to charge up a shot before firing. In comparison to other weapons, a 533 ms charge time is relatively fast, making it suitable for aggressive builds. This allows you to deal damage quickly while cycling between your other weapons. In PvP, it’s particularly useful for taking out enemies at medium to long ranges without having to wait too long for the shot to land.
- Magazine Size: 6 rounds
- The weapon holds 6 rounds per magazine, which is a moderate size for a charged weapon. While it’s not a massive magazine, it’s balanced enough to allow for consistent damage output during engagements. With the Bait and Switch perk, you can maximize your damage potential with the limited ammo you have, making it essential to be precise with your shots.
- Impact: 120
- The weapon’s impact is quite significant, meaning each shot lands with a heavy hit. This is beneficial when trying to deal with tougher enemies, especially those with high health or armor.
- Range: 55
- The range of Finality’s Auger allows it to function effectively at medium to long distances. In PvP, this makes it a decent choice for both quick swaps and long-range precision shots.
- Reload Speed: 2.7 seconds
- Finality’s Auger has a moderate reload speed, which isn’t super fast but isn’t slow either. Reloading during combat can feel cumbersome, so using this weapon with high-damage, quick-to-reload secondary weapons will keep your damage uptime as high as possible.
Best Loadouts for the Sundered Doctrine Dungeon
To make your journey easier, consider using these loadouts:
Recommended Weapons:
✔ Primary: Kinetic SMG or Auto Rifle (for ad-clear) ✔ Secondary: Arc Fusion Rifle or Void Grenade Launcher (for shield-breaking) ✔ Heavy: Solar Rocket Launcher (for boss DPS)
Best Subclasses & Mods:
✔ Titan: Solar + Loreley Splendor Helm for survivability ✔ Hunter: Void + Stylish Executioner for invisibility advantage ✔ Warlock: Solar + Well of Radiance for sustained healing and team support
Secure Your Catalyst With LFCarry
Unlocking the Finality’s Auger Exotic Catalyst is a demanding process, requiring puzzle-solving skills and combat efficiency. If you’re looking for a fast and reliable way to acquire it, LFCarry’s professional boosters can help you complete the dungeon efficiently, ensuring you don’t miss out on this top-tier upgrade.
Read also:
Darya Chavez is a gaming journalist passionate about delivering the latest news from the world of video games. With a sharp eye for industry trends and updates, she keeps players informed about upcoming releases, events, and major game changes.